
Camera Focus Problems: How to Take Sharper Photos
Looking through the viewfinder, you see all the elements coming together; you just know it’s going to be a stunning shot!
Click, click, click. Perfect timing, you got it!
Except you didn’t: reviewing the image later, you realize that the best shot isn’t sharp. Scrolling through to the next frame - the exact same story. And so on.
You blew it. What went wrong?
We’ve all been there. And once we have, we usually vow to never go there again.
Okay, perhaps it’s not realistic to imagine that every single shot you take from now on will be sharp. But, at least most of them, right?
The question is - how?
I’ve put together a troubleshooting guide, explaining how to take sharper photos. I will go over the leading causes of soft images and then explain their simple fixes.
Camera Focus Problem #1: The Image Is Sharp, But Not Where You Want It
Cause
The problem here is most likely something causing the focus point to move between the moment you focus and the moment you press the shutter. However, there are also a couple of other reasons your camera focus might be off from the outset. Let’s take a look.
Solution
The solution depends on precisely what you’re doing wrong. Do any of the following scenarios sound familiar?
- Know Your Subject
One of the most common camera focusing errors of novice photographers is setting focus on the wrong part of the image in the first place.
If you’re shooting a view with a lot going on, it can sometimes be tricky to know what the most essential part of the scene is. But just like a movie, every photo has its main star. Decide who or what the photo is about, and make your focus selection there.
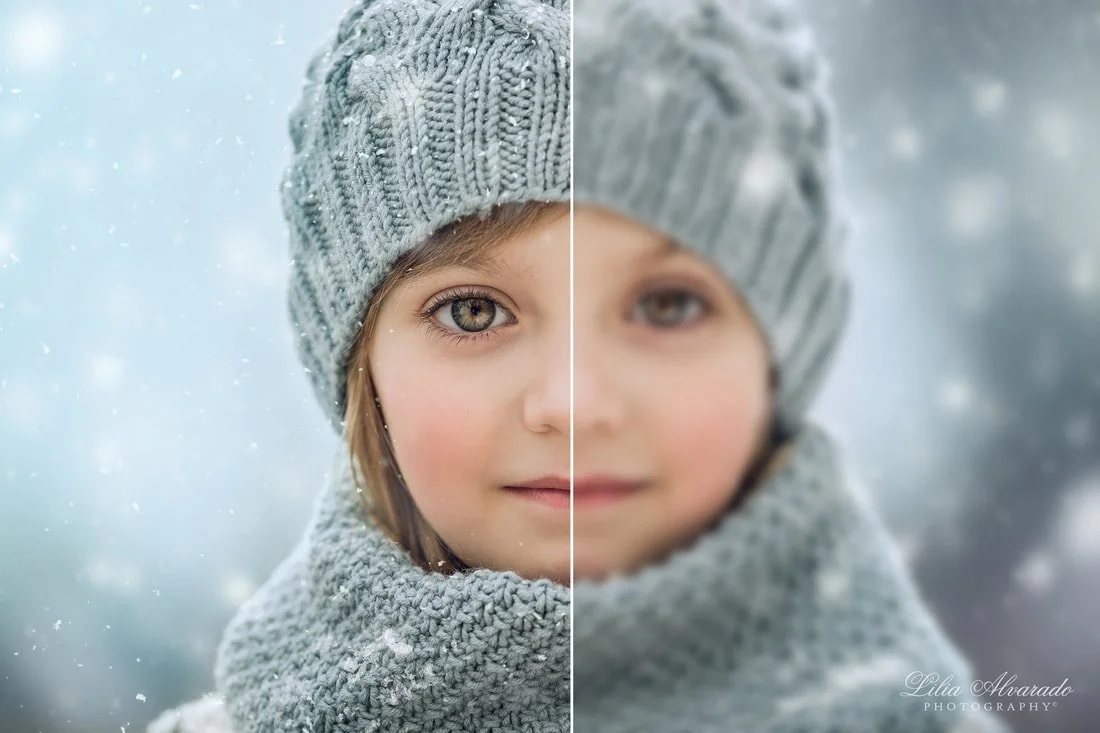
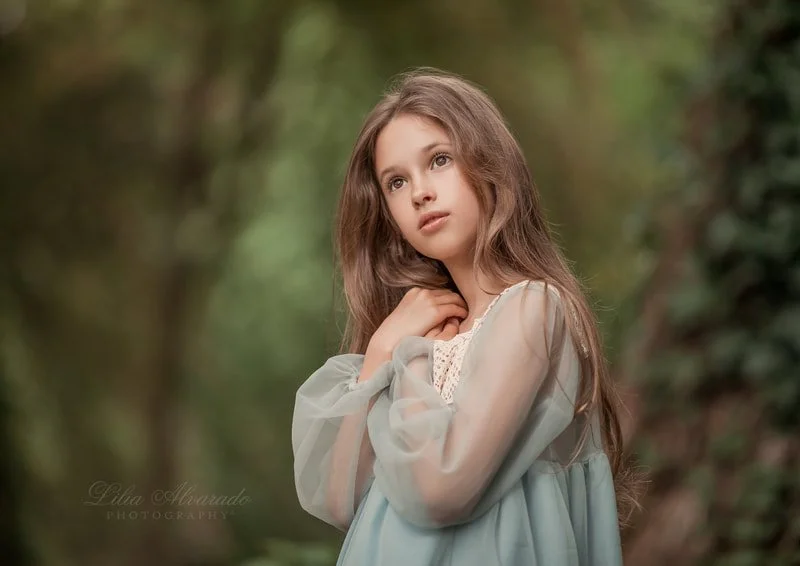
And remember, if it’s a person or an animal, the focus should always be on their eye(s); as this is the first place that the viewer will look at.
- Compose First, Focus Second
Even professionals still shoot out-of-focus images from time to time. The most common cause of this is composing a shot, focusing, and then deciding to recompose the frame slightly right before pressing the shutter.
What frequently happens here is that, in turning the camera to recompose, the photographer moves ever so slightly either backwards or forwards. A minor shift in distance from the subject like this can be enough to move the point of focus from, say, the model’s eyes to the end of the model’s nose. And nobody wants to see a sharp nose and blurry eyes.
The key is to compose first and focus second. If you want your subject off-center, you need to become familiar with the focus controls on your camera so that you can quickly choose the AF point that’s positioned closest to the subject within the frame.
And if you really must alter the composition slightly before firing the shutter, make sure that your distance from the subject doesn’t change at all. Shooting at a smaller aperture will also help a lot, as a deep depth-of-field will hide any minor inaccuracy.

- Use Back Button Focusing
Some cameras allow you to set up Back Button Focusing. This means that instead of half-pressing the shutter release button to focus, you control AF via a custom button on the back of the camera.
Although it can take a little while to get used to focusing via the rear button at first, once you do, you’ll likely find that your focusing is quicker and more accurate. This is because Back Button Focusing removes any risk that the camera might accidentally re-focus as you press the shutter.
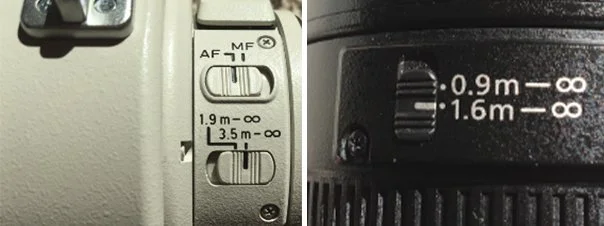
- Check the Focus Distance Limiter
Some lenses feature a Focus Distance Limiter, usually in the form of a quick-select switch on the barrel of the lens. This function allows you to select and limit the area within which the lens will search for a focus point (for example, limiting the focus to near distances only).
If you don't utilize the Focus Distance Limiter while trying to focus outside of the limited focus distance area, this will cause your photos to be soft and out of focus.
- Change Your Pose
The way that you pose your models makes a big difference to image sharpness. For example, if you’re shooting wide-open at an aperture of, say, f/1.8 for a really shallow depth-of-field, even a small change in distance between the model and the camera will make a big difference to the focus. This means that a model turned slightly to one side will have one eye sharp, and the other will be out of focus.
That’s fine if it’s the look you’re going for (just be sure to focus on the eye that’s closest to the camera). However, if you want both eyes in focus, this can easily be achieved by asking the model to turn straight to the camera.
This technique is just as valid for when you have more than one person in the shot: keeping two or more models lined up on the same focal plane (i.e., the same distance from the camera) will guarantee that everyone is sharp.
But, if you position one model slightly forward of the others, and focus there, the other models will be blurred. This can be a useful creative technique - when it’s done on purpose and with a good reason. So, the idea is for you to be in control.
- Change Your Aperture
And if the above effect isn’t what you wanted (one model in the foreground sharp, the others soft) then, of course, the answer is to close down your aperture for a deeper depth-of-field. This will help you get both the foreground and background models in focus.
And a deep depth-of-field is particularly important when shooting landscapes. On a wide landscape, the viewer’s eye will want to explore the whole scene. But, it can be very frustrating for the viewer if only a small portion of the image is sharp, with the background and foreground all out of focus - since there is nothing to rest their eyes upon.
Avoid this problem by shooting at f/16 or f/22. This way, the maximum amount of your scene details will be in focus.
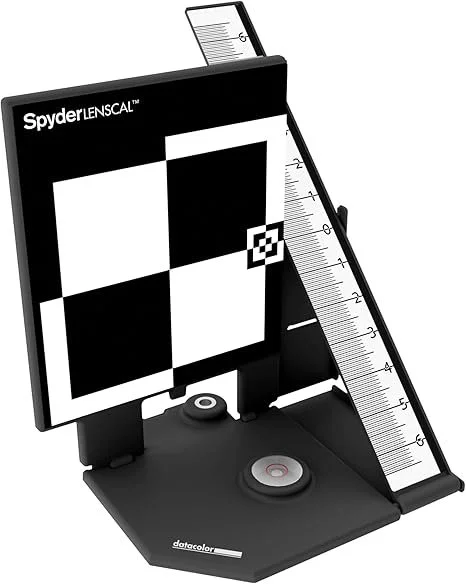
- Calibrate Your Lens
Finally, if you’ve followed all of the above mentioned, but your focus is still consistently off, then you may need to re-calibrate your lens using a calibration tool. Something like the Datacolor SpyderLensCal will do the trick.
Camera Focus Problem #2: None of the Image Is Sharp
Cause
If no part of the photo is sharp, then it’s likely not a camera focus problem at all, but instead, a problem caused by camera shake or motion blur. In other words, either your camera is moving around, or the subject is.
Solution
There are a number of possible solutions you can try here.
- Use a Tripod
Firstly, if you’re shooting something static, such as a landscape or still life, then you should be using a tripod with a remote release to avoid vibrations.
- Use a Faster Shutter Speed
If putting the camera on a tripod isn’t an option for some reason, you’ll likely need to use a faster shutter speed.
Exactly how fast you should go will depend on a number of variables. If the photo isn’t sharp because you moved the camera slightly (due to strong wind, shaky hands, too much coffee…) then it might be enough just to move up to 1/125, perhaps even as slow as 1/60.
But, if the scene includes moving objects or people, then you’ll likely need to go faster still: say 1/250 for people walking quickly; 1/500 or faster for people running and for vehicles or anything else that’s moving rapidly.
- Consider the Focal Length to Shutter Speed Ratio
On the other hand, if the subject isn’t moving - and you’re using a reasonably fast shutter speed already, yet the photo still isn’t sharp - then the problem might be caused by an overly long or heavy lens, upsetting the balance of the camera.
You’ll often hear photographers talk about focal length versus shutter speed. This is a simple formula that, in theory, can help you know which shutter speed is safe to use with most lenses.
I say “in theory”, because things aren’t quite so straightforward in practice. For example, you might hear that a good rule of thumb is to use a shutter speed equal to, or higher than, the focal length of the lens you are using. That is, if shooting with a 250mm lens, you would want to set a shutter speed of 1/250 or faster.
Every photographer is different and has their own approach. While the 1x formula might work for some, it may still result in blurred photos for others. Some photographers even suggest setting a shutter speed 3x the length of your lens! In this case, it would mean using a shutter speed faster than 1/750 (in practice, on most cameras this would have to be 1/1000). Although this can be a good general rule to keep in mind, whether you should follow the 1x, 2x or 3x rule depends on your own particular camera-holding skills.
No matter how steady-handed you are, though, the important thing to remember is that using a shutter speed slower than the focal length of the lens will put you in risky territory.
The safest thing to do here is to experiment with shooting at different shutter speeds beforehand, to see where your own limit lies. This way, when it comes to shooting for real, you can do so with total confidence in your abilities.
- Improve Your Camera Posture
Thankfully, even if your handheld-shooting talents are still a bit lacking, there a few things you can do to improve your chances of getting a sharp image without a tripod.
First of all, you need to be standing firmly with your weight equally distributed between both feet. Next, make sure that your elbows are pulled in close to your sides, not sticking out, flailing around in the wind. Support your elbows by pressing them against your body if you can. And if there’s a wall, tree, or other firmly grounded object nearby, steady yourself using this too. Finally, take a deep breath and press the shutter as you gently exhale.
- Use Image Stabilization
If none of these techniques work, then your best option is to use lenses (and/or a camera body) with built-in image stabilization. Good optical lens stabilization can often make a difference of as much as 3 or 4 stops when shooting handheld in low light. That’s a big difference!
Camera Focus Problem #3: Overall Lack of Definition
Cause
If your photos are soft, grainy, pixelated, or in some other way lacking in definition, this is, most likely, neither a problem of focusing nor one caused by your camera-holding skills. Instead, it’s probably got to do with image quality.
Solution
A number of different factors can influence the quality of a digital image. Check out the following to make sure that neither your equipment nor technique is letting you down.
- More Accurate Exposure
An underexposed image “pulled up” in Photoshop or Lightroom will exhibit more noise than one that is correctly exposed. In practice, more noise means less sharpness. In order to maximize image sharpness, make sure that your exposure is always spot on.
- Use a Lower ISO
Using a high ISO will make it easier to get a correctly exposed image in low-lighting situations. However, this comes at a disadvantage - increased digital noise. And, just like with underexposure, this effectively means a softer, less sharply defined image. If your photos are very grainy and lack sharp detail, you may need to shoot at a lower ISO rating.
Precisely how low the rating is will depend on your camera model. The lower you can go, the higher quality your images will be.
- Use Prime Lenses
Zoom lenses certainly have their purpose, but while they offer greater convenience than fixed focal length prime lenses, they usually come with a considerable compromise in terms of image sharpness. If you have a huge “ultra-zoom” - particularly a budget priced one - the optics may not be especially good. Switching to tack-sharp prime lenses will likely improve the image quality of your photos significantly.
For example, one lens I really enjoy using is the Canon 135mm f/2. It’s super sharp while offering a fast maximum aperture and producing really nice looking bokeh. This makes it ideal for head and shoulders portraits, or when you want to separate the subject from the background.

- Stay in the Sweet Spot
Most lenses perform their best in terms of sharpness somewhere between about f/4 and f/16. At wider apertures you will tend to lose a significant degree of sharpness towards the corners of the frame, and, if using cheaper lenses, quite often also in the center of the image. For maximum definition, experiment with your lens to discover its optimum aperture settings.
Sharpen Focus in Post-Production
Even if you do manage to get all your images looking nice and sharp, you’ll likely want to add some extra definition to them at the post-production stage.
Whether you use Photoshop, Lightroom, or any other photo editing software, it’s usually possible to add a degree of extra sharpness across the entire image. Be careful not to overdo this effect though, or you can risk making the photo look fake: more like a digital illustration than an image taken from real life. Subtlety is the key here.
If you want to learn how to use sharpening techniques, you can check out tutorials.
Final Thoughts
There’s no photographer who doesn’t take a few soft photos from time to time. It’s just part of the risk of experimenting and pushing yourself.
Of course, the goal is to keep the blurry shots to an absolute minimum. By following the above tips, you can be sure that your sharp-to-soft-ratio will stay acceptably high.
Please do consider sharing the article, if you liked it and think it might help someone else.
I’m always happy to connect! You can visit my social media in the links below:
My website
My Facebook page
My Instagram